Using OpenLineage with Airflow
In this tutorial, you'll configure Apache Airflow® to send OpenLineage events to Marquez and explore a realistic troubleshooting scenario.
Table of Contents
- Prerequisites
- Get and start Marquez
- Configure Apache Airflow to send OpenLineage events to Marquez
- Write Airflow DAGs
- View Collected Lineage in Marquez
- Troubleshoot a Failing DAG with Marquez
- Next Steps
- Feedback?
Prerequisites
Before you begin, make sure you have installed:
- Docker 17.05+
- Apache Airflow 2.7+ running locally.
For an easy path to installing and running Airflow locally for development purposes, see: Quick Start.
Get and start Marquez
-
Create a directory for Marquez. Then, check out the Marquez source code by running:
- MacOS/Linux
- Windows
$ git clone https://github.com/MarquezProject/marquez && cd marquez$ git config --global core.autocrlf false$ git clone https://github.com/MarquezProject/marquez && cd marquez -
Both Airflow and Marquez require port 5432 for their metastores, but the Marquez services are easier to configure. You can also assign the database service to a new port on the fly. To start Marquez using port 2345 for the database, run:
- MacOS/Linux
- Windows
$ ./docker/up.sh --db-port 2345Verify that Postgres and Bash are in your
PATH, then run:$ sh ./docker/up.sh --db-port 2345 -
To view the Marquez UI and verify it's running, open http://localhost:3000. The UI allows you to:
- view cross-platform dependencies, meaning you can see the jobs across the tools in your ecosystem that produce or consume a critical table.
- view run-level metadata of current and previous job runs, enabling you to see the latest status of a job and the update history of a dataset.
- get a high-level view of resource usage, allowing you to see trends in your operations.
Configure Airflow to send OpenLineage events to Marquez
-
To configure Airflow to emit OpenLineage events to Marquez, you need to modify your local Airflow environment and add a dependency. First, define an OpenLineage transport. One way you can do this is by using an environment variable. To use
httpand send events to the Marquez API running locally on port5000, run:- MacOS/Linux
- Windows
$ export AIRFLOW__OPENLINEAGE__TRANSPORT='{"type": "http", "url": "http://localhost:5000", "endpoint": "api/v1/lineage"}'$ set AIRFLOW__OPENLINEAGE__TRANSPORT='{"type": "http", "url": "http://localhost:5000", "endpoint": "api/v1/lineage"}' -
You also need to define a namespace for Airflow jobs. It can be any string. Run:
- MacOS/Linux
- Windows
$ export AIRFLOW__OPENLINEAGE__NAMESPACE='my-team-airflow-instance'$ set AIRFLOW__OPENLINEAGE__NAMESPACE='my-team-airflow-instance' -
To add the required Airflow OpenLineage Provider package to your Airflow environment, run:
- MacOS/Linux
- Windows
$ pip install apache-airflow-providers-openlineage$ pip install apache-airflow-providers-openlineage -
To complete this tutorial, you also need to enable local Postgres operations in Airflow. To do this, run:
- MacOS/Linux
- Windows
$ pip install apache-airflow-providers-postgres$ pip install apache-airflow-providers-postgres -
Create a database in your local Postgres instance and create an Airflow Postgres connection using the default ID (
postgres_default). For help with the former, see: Postgres Documentation. For help with the latter, see: Managing Connections.
Write Airflow DAGs
In this step, you will create two new Airflow DAGs that perform simple tasks and add them to your existing Airflow instance. The counter DAG adds 1 to a column every minute, while the sum DAG calculates a sum every five minutes. This will result in a simple pipeline containing two jobs and two datasets.
-
In
dags/, create a file namedcounter.pyand add the following code:import pendulumfrom airflow.decorators import dag, taskfrom airflow.providers.postgres.operators.postgres import PostgresOperatorfrom airflow.utils.dates import days_ago@dag(schedule='*/1 * * * *',start_date=days_ago(1),catchup=False,is_paused_upon_creation=False,max_active_runs=1,description='DAG that generates a new count value equal to 1.')def counter():query1 = PostgresOperator(task_id='if_not_exists',postgres_conn_id='postgres_default',sql='''CREATE TABLE IF NOT EXISTS counts (value INTEGER);''',)query2 = PostgresOperator(task_id='inc',postgres_conn_id='postgres_default',sql='''INSERT INTO "counts" (value) VALUES (1);''',)query1 >> query2counter() -
In
dags/, create a file namedsum.pyand add the following code:import pendulumfrom airflow.decorators import dag, taskfrom airflow.providers.postgres.operators.postgres import PostgresOperatorfrom airflow.utils.dates import days_ago@dag(start_date=days_ago(1),schedule='*/5 * * * *',catchup=False,is_paused_upon_creation=False,max_active_runs=1,description='DAG that sums the total of generated count values.')def sum():query1 = PostgresOperator(task_id='if_not_exists',postgres_conn_id='postgres_default',sql='''CREATE TABLE IF NOT EXISTS sums (value INTEGER);''')query2 = PostgresOperator(task_id='total',postgres_conn_id='postgres_default',sql='''INSERT INTO sums (value)SELECT SUM(value) FROM counts;''')query1 >> query2sum() -
Restart Airflow to apply the changes. Then, unpause both DAGs.
View Collected Lineage in Marquez
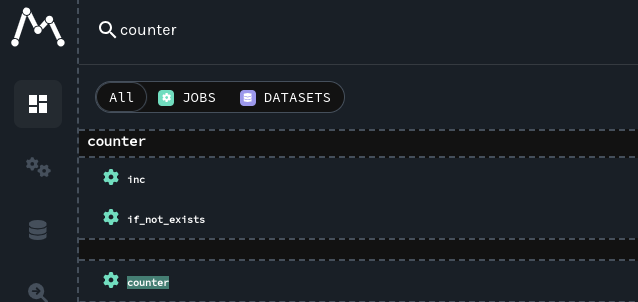
- To view lineage collected by Marquez from Airflow, browse to the Marquez UI by visiting http://localhost:3000. Then, use the search bar in the upper left to search for the
counter.incjob. To view lineage metadata forcounter.inc, click on the job from the drop-down list:
-
Look at the lineage graph for
counter.inc, where you should see<database>.public.countsas an output dataset andsum.totalas a downstream job:
Troubleshoot a Failing DAG with Marquez
-
In this step, you'll simulate a pipeline outage due to a cross-DAG dependency change and see how the enhanced lineage from OpenLineage+Marquez makes breaking schema changes easy to troubleshoot.
Say
Team Aowns the DAGcounter.Team Aupdatescounterto rename thevaluescolumn in thecountstable tovalue_1_to_10without properly communicating the schema change to the team that ownssum.Apply the following changes to
counterto simulate the breaking change:query1 = PostgresOperator(- task_id='if_not_exists',+ task_id='alter_name_of_column',postgres_conn_id='example_db',sql='''- CREATE TABLE IF NOT EXISTS counts (- value INTEGER- );''',+ ALTER TABLE "counts" RENAME COLUMN "value" TO "value_1_to_10";+ ''')query2 = PostgresOperator(task_id='inc',postgres_conn_id='example_db',sql='''- INSERT INTO counts (value)+ INSERT INTO counts (value_1_to_10)VALUES (1)''',)Like the owner of
sum,Team B, would do, note the failed runs in the DataOps view in Marquez:
Team Bcan only guess what might have caused the DAG failure as no recent changes have been made to the DAG. So, the team decides to check Marquez. -
In Marquez, navigate to the Datasets view and select your Postgres instance from the namespace dropdown menu in the top-right corner. Then, click on the
<database>.public.countsdataset and inspect the graph. You'll find the schema on the node: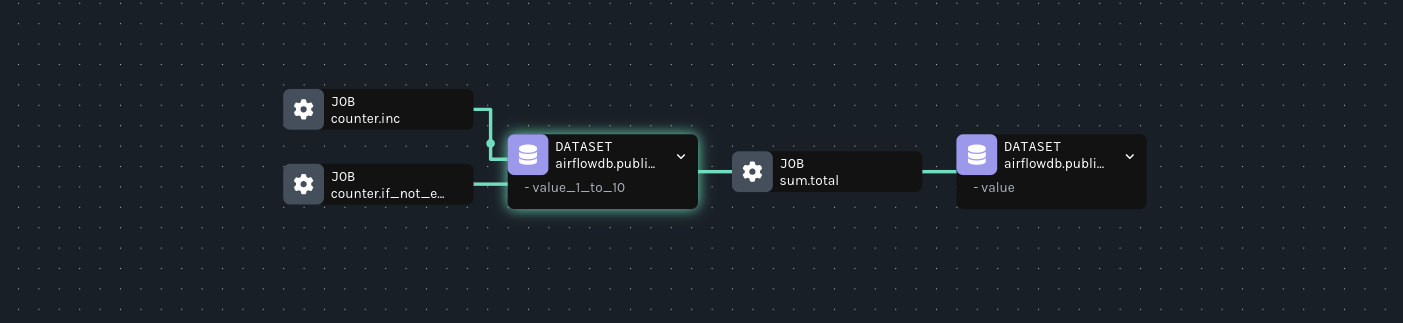
-
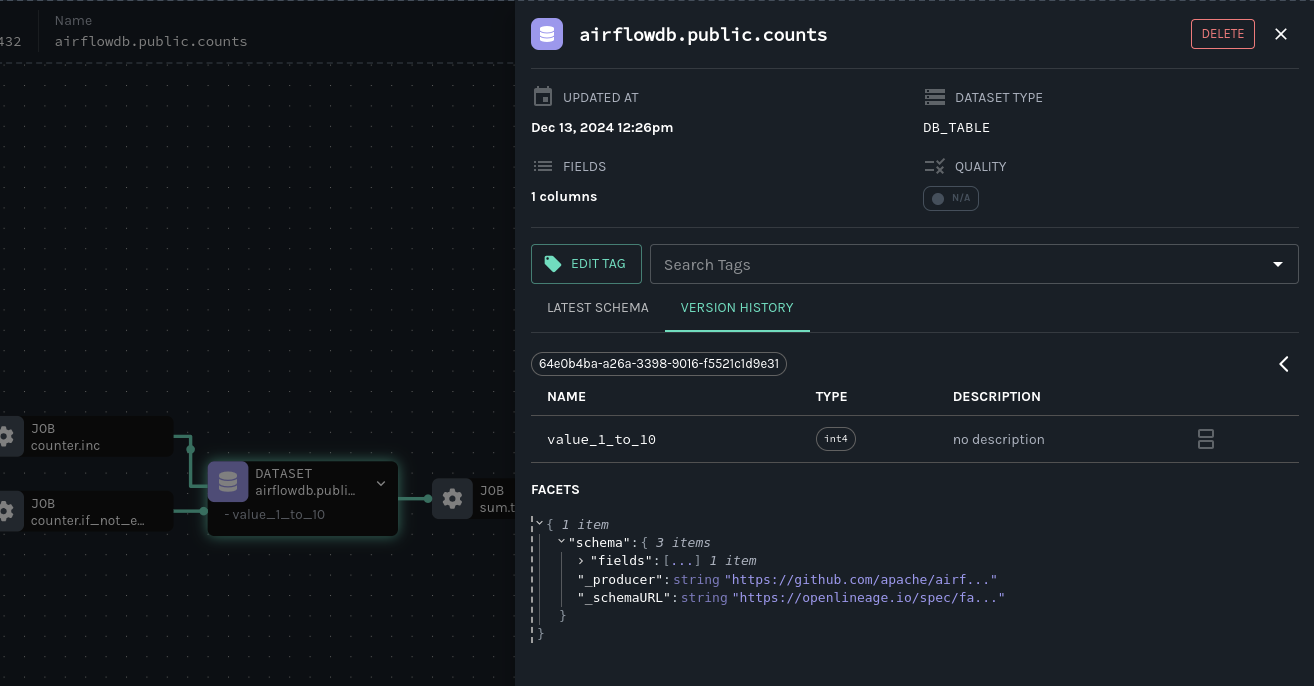
Imagine you don't recognize the column and want to know what it was originally and when it changed. Clicking on the node will open the detail drawer. There, using the version history, find the run in which the schema changed:
-
In Airflow, fix the downstream DAG that broke by updating the task that calculates the count total to use the new column name:
query2 = PostgresOperator(task_id='total',postgres_conn_id='example_db',sql='''- INSERT INTO sums (value)- SELECT SUM(value) FROM counts;+ SELECT SUM(value_1_to_10) FROM counts;''') -
Rerun the DAG. In Marquez, verify the fix by looking at the recent run history in the DataOps view:

Next Steps
- Review the Marquez HTTP API used to collect Airflow DAG metadata and learn how to build your own integrations using OpenLineage.
- Take a look at the
openlineage-sparkintegration that can be used with Airflow.
Feedback?
What did you think of this guide? Let us know in the OpenLineage Slack or the Marquez Slack. You can also propose changes directly by opening a pull request.