Usage Example
Getting Started
To try out the client, follow the steps below to install and explore OpenLineage, Marquez (the reference implementation of OpenLineage), and the client itself. Then, the instructions will show you how to use these tools to add a run event and datasets to an existing namespace.
Prerequisites
- Docker 17.05+
- Docker Compose 1.29.1+
- Git (preinstalled on most versions of MacOS; verify your version with
git version) - 4 GB of available memory (the minimum for Docker — more is strongly recommended)
Install OpenLineage and Marquez
Clone the Marquez Github repository:
git clone https://github.com/MarquezProject/marquez.git
Install the Python client
pip install openlineage-python
Start Docker and Marquez
Start Docker Desktop Run Marquez with preloaded data:
cd marquez
./docker/up.sh --seed
Marquez should be up and running at http://localhost:3000.
Take a moment to explore Marquez to get a sense of how metadata is displayed in the UI. Namespaces – the global contexts for runs and datasets – can be found in the top right corner, and icons for jobs and runs can be found in a tray along the left side.
Next, configure OpenLineage and add a script to your project that will generate a new job and new datasets within an existing namespace (here we’re using the food_delivery namespace that got passed to Marquez with the –seed argument we used earlier).
Create a directory for your script:
..
mkdir python_scripts && cd python_scripts
In the python_scripts directory, create a Python script (we used the name generate_events.py for ours) and an openlineage.yml file.
In openlineage.yml, define a transport type and URL to tell OpenLineage where and how to send metadata:
transport:
  type: http
  url: http://localhost:5000
In generate_events.py, import the Python client and the methods needed to create a job and datasets. Also required (to create a run): the datetime and uuid packages:
from openlineage.client import OpenLineageClient
from openlineage.client.event_v2 import (
    Dataset,
    InputDataset,
    Job,
    OutputDataset,
    Run,
    RunEvent,
    RunState,
)
from openlineage.client.uuid import generate_new_uuid
from datetime import datetime
Then, in the same file, initialize the Python client:
client = OpenLineageClient()
It is also possible to specify parameters such as URL for client to connect to, without using environment variables or openlineage.yaml file, by using the config parameter:
client = OpenLineageClient(config={
    "transport": {
        "type": "http",
        "url": "http://localhost:5000"
    }
})
For more details about options to setup OpenLineageClient such as API tokens or HTTP transport settings, please refer to the following example
Specify the producer of the new lineage metadata with a string:
producer = "OpenLineage.io/website/blog"
Now you can create some basic dataset objects. These require a namespace and name:
inventory = Dataset(namespace="food_delivery", name="public.inventory")
menus = Dataset(namespace="food_delivery", name="public.menus_1")
orders = Dataset(namespace="food_delivery", name="public.orders_1")
You can also create a job object (we’ve borrowed this one from the existing food_delivery namespace):
job = Job(namespace="food_delivery", name="example.order_data")
To create a run object you’ll need to specify a unique ID:
run = Run(runId=str(generate_new_uuid()))
a START run event:
client.emit(
	RunEvent(
		eventType=RunState.START,
		eventTime=datetime.now().isoformat(),
		run=run,
        job=job,
        producer=producer,
	)
)
and, finally, a COMPLETE run event:
client.emit(
	RunEvent(
		eventType=RunState.COMPLETE,
		eventTime=datetime.now().isoformat(),
		run=run, job=job, producer=producer,
		inputs=[inventory],
		outputs=[menus, orders],
	)
)
Now you have a complete script for creating datasets and a run event! Execute it in the terminal to send the metadata to Marquez:
python3 generate_scripts.py
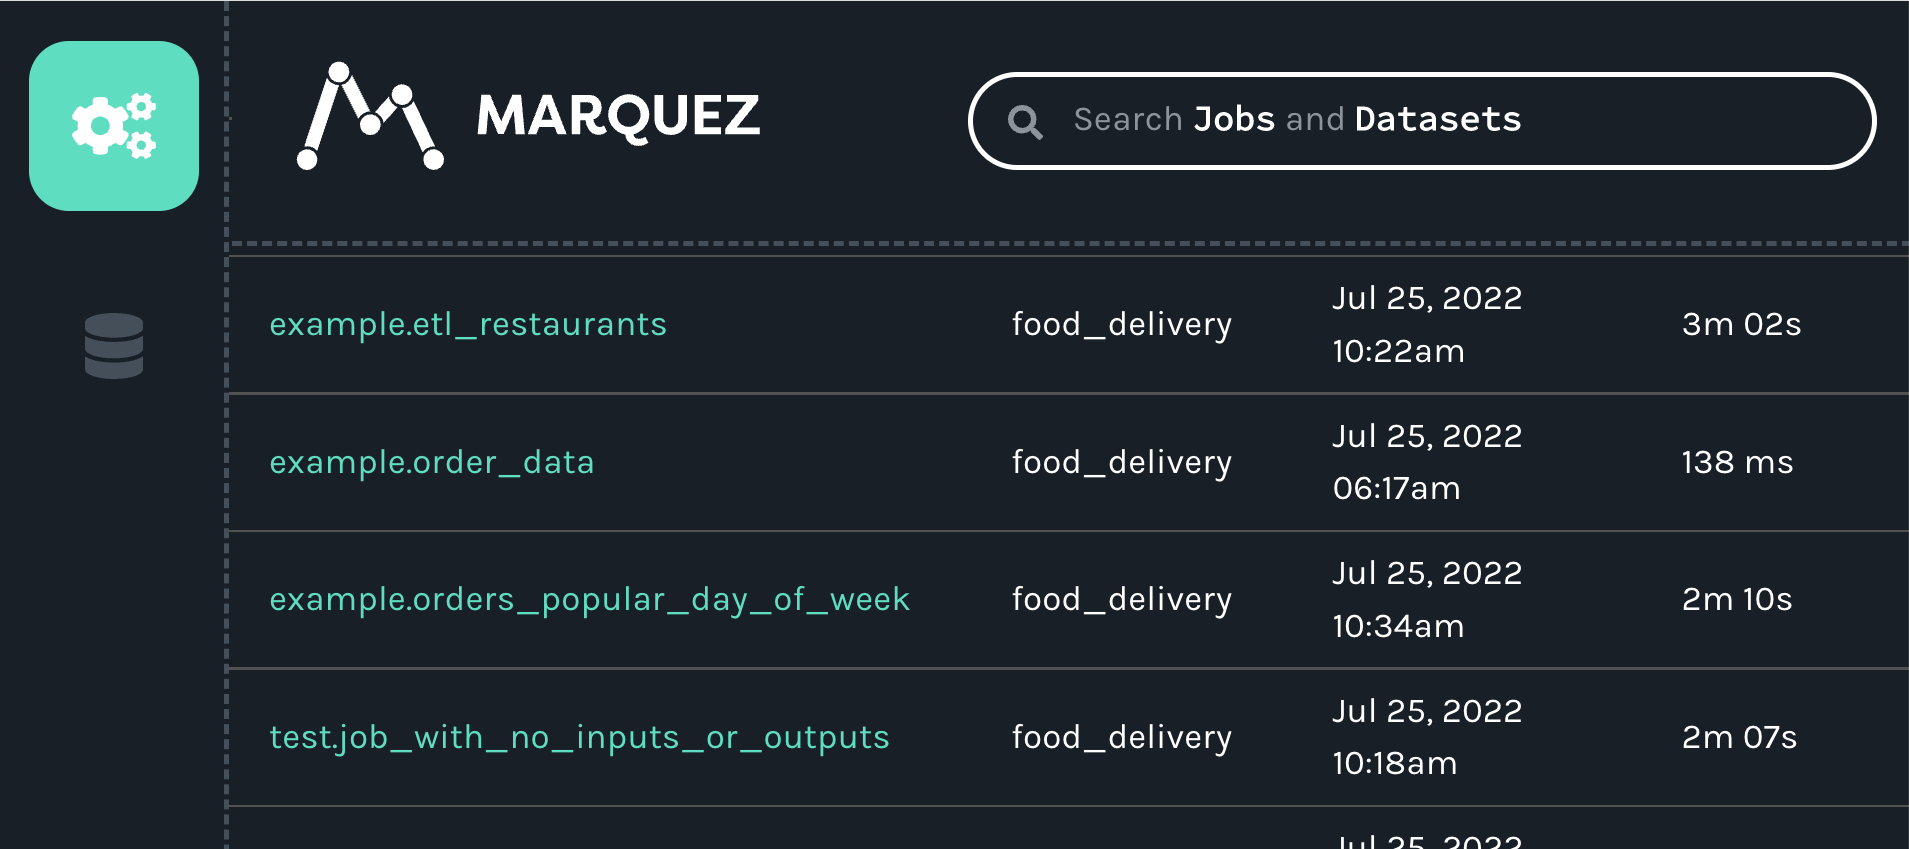
Marquez will update itself automatically, so the new job and datasets should now be visible in the UI. Clicking on the jobs icon (the icon with the three interlocking gears), will make the example.order_data job appear in the list of jobs:
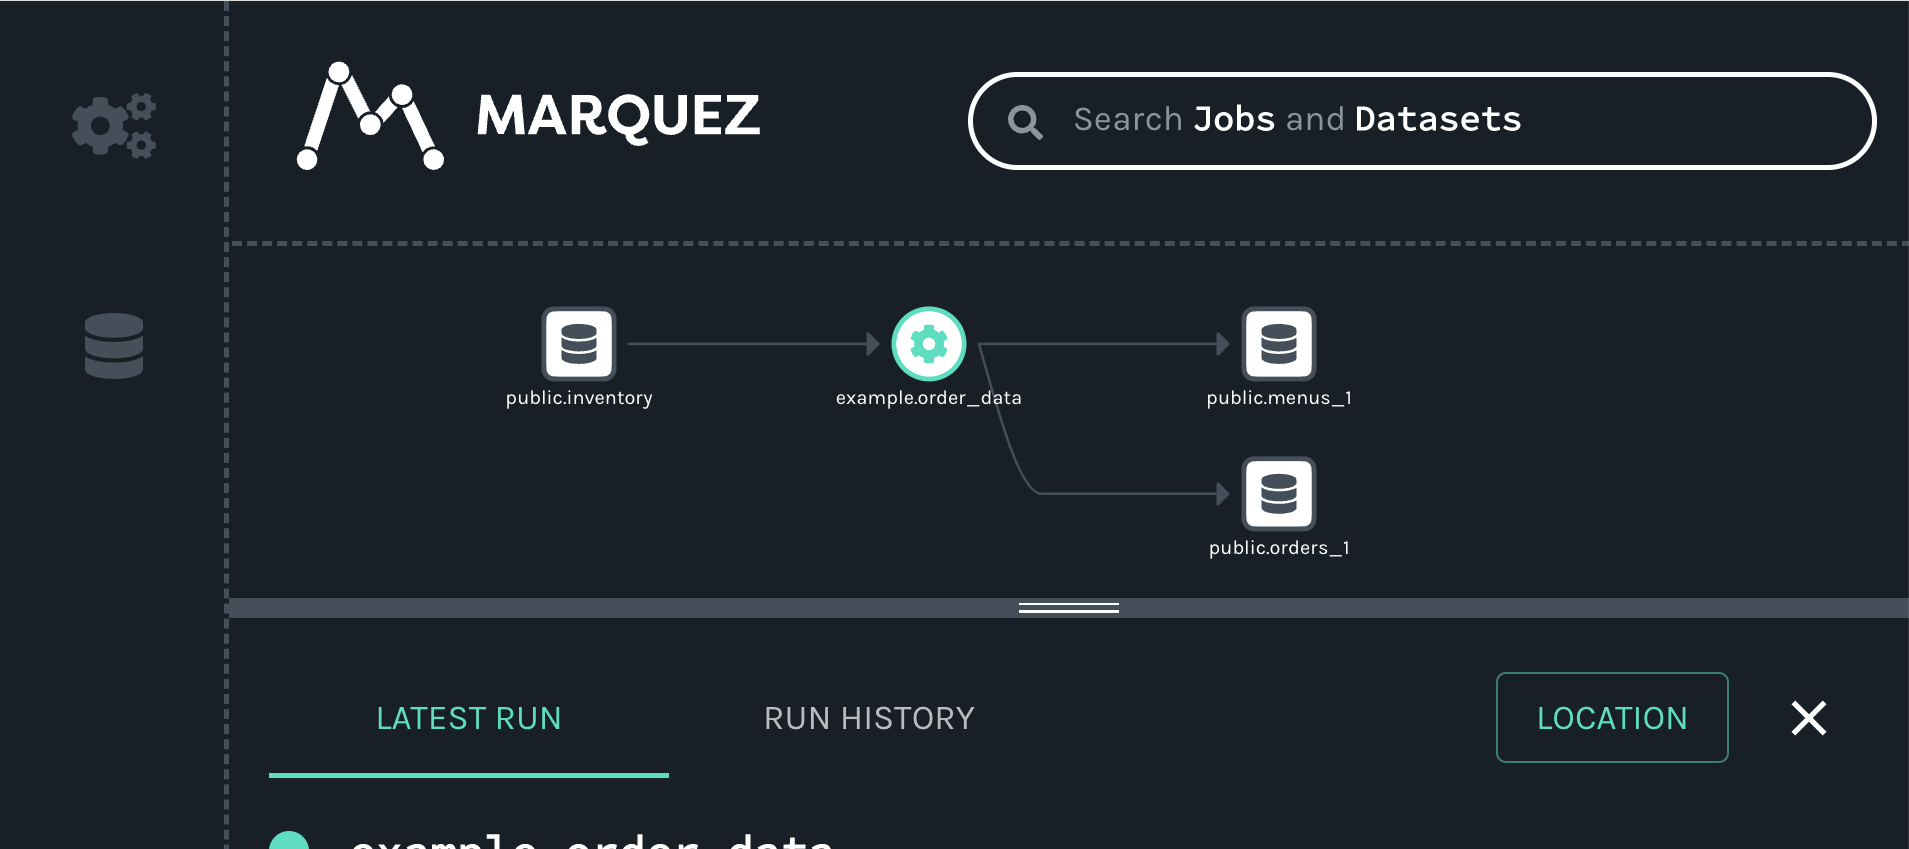
When you click on the job, you will see a new map displaying the job, input and outputs we created with our script:
Full Example Source Code
#!/usr/bin/env python3
from datetime import datetime, timedelta, timezone
from random import random

from openlineage.client import OpenLineageClient
from openlineage.client.event_v2 import (
    Dataset,
    InputDataset,
    Job,
    OutputDataset,
    Run,
    RunEvent,
    RunState,
)
from openlineage.client.facet_v2 import (
    nominal_time_run,
    schema_dataset,
    source_code_location_job,
    sql_job,
)
from openlineage.client.uuid import generate_new_uuid

PRODUCER = "https://github.com/openlineage-user"
namespace = "python_client"
dag_name = "user_trends"

# update to your host
url = "http://mymarquez.host:5000"
api_key = "1234567890ckcu028rzu5l"

client = OpenLineageClient(
    config={
        "transport": {
            "type": "http",
            "url": url,
            "auth": {"type": "api_key", "apiKey": api_key} if api_key else None,
        }
    }
    # Note: When running marquez in your local environment, you usually do not need the api_key.
)

# If you want to log to a file instead of Marquez
# from openlineage.client import OpenLineageClient
# from openlineage.client.transport.file import FileConfig, FileTransport
#
# file_config = FileConfig(
#     log_file_path="ol.json",
#     append=True,
# )
#
# client = OpenLineageClient(transport=FileTransport(file_config))


# generates job facet
def job(job_name, sql, location):
    facets = {"sql": sql_job.SQLJobFacet(query=sql)}
    if location != None:
        facets.update(
            {
                "sourceCodeLocation": source_code_location_job.SourceCodeLocationJobFacet(
                    "git", location
                )
            }
        )
    return Job(namespace=namespace, name=job_name, facets=facets)


# generates run racet
def run(run_id, hour):
    return Run(
        runId=run_id,
        facets={
            "nominalTime": nominal_time_run.NominalTimeRunFacet(
                nominalStartTime=f"2022-04-14T{twoDigits(hour)}:12:00Z",
                # nominalEndTime=None
            )
        },
    )


# generates dataset
def dataset(name, schema=None, ns=namespace):
    if schema == None:
        facets = {}
    else:
        facets = {"schema": schema}
    return Dataset(namespace=ns, name=name, facets=facets)


# generates output dataset
def outputDataset(dataset, stats):
    output_facets = {"stats": stats, "outputStatistics": stats}
    return OutputDataset(dataset.namespace,
                         dataset.name,
                         facets=dataset.facets,
                         outputFacets=output_facets)


# generates input dataset
def inputDataset(dataset, dq):
    input_facets = {
        "dataQuality": dq,
    }
    return InputDataset(dataset.namespace, dataset.name,
                        facets=dataset.facets,
                        inputFacets=input_facets)


def twoDigits(n):
    if n < 10:
        result = f"0{n}"
    elif n < 100:
        result = f"{n}"
    else:
        raise f"error: {n}"
    return result


now = datetime.now(timezone.utc)


# generates run Event
def runEvents(job_name, sql, inputs, outputs, hour, min, location, duration):
    run_id = str(generate_new_uuid())
    myjob = job(job_name, sql, location)
    myrun = run(run_id, hour)
    started_at = now + timedelta(hours=hour, minutes=min, seconds=20 + round(random() * 10))
    ended_at = started_at + timedelta(minutes=duration, seconds=20 + round(random() * 10))
    return (
        RunEvent(
            eventType=RunState.START,
            eventTime=started_at.isoformat(),
            run=myrun,
            job=myjob,
            producer=PRODUCER,
            inputs=inputs,
            outputs=outputs,
        ),
        RunEvent(
            eventType=RunState.COMPLETE,
            eventTime=ended_at.isoformat(),
            run=myrun,
            job=myjob,
            producer=PRODUCER,
            inputs=inputs,
            outputs=outputs,
        ),
    )


# add run event to the events list
def addRunEvents(events, job_name, sql, inputs, outputs, hour, minutes, location=None, duration=2):
    (start, complete) = runEvents(job_name, sql, inputs, outputs, hour, minutes, location, duration)
    events.append(start)
    events.append(complete)


events = []

# create dataset data
for i in range(0, 5):
    user_counts = dataset("tmp_demo.user_counts")
    user_history = dataset(
        "temp_demo.user_history",
        schema_dataset.SchemaDatasetFacet(
            fields=[
                schema_dataset.SchemaDatasetFacetFields(
                    name="id", type="BIGINT", description="the user id"
                ),
                schema_dataset.SchemaDatasetFacetFields(
                    name="email_domain", type="VARCHAR", description="the user id"
                ),
                schema_dataset.SchemaDatasetFacetFields(
                    name="status", type="BIGINT", description="the user id"
                ),
                schema_dataset.SchemaDatasetFacetFields(
                    name="created_at",
                    type="DATETIME",
                    description="date and time of creation of the user",
                ),
                schema_dataset.SchemaDatasetFacetFields(
                    name="updated_at",
                    type="DATETIME",
                    description="the last time this row was updated",
                ),
                schema_dataset.SchemaDatasetFacetFields(
                    name="fetch_time_utc",
                    type="DATETIME",
                    description="the time the data was fetched",
                ),
                schema_dataset.SchemaDatasetFacetFields(
                    name="load_filename",
                    type="VARCHAR",
                    description="the original file this data was ingested from",
                ),
                schema_dataset.SchemaDatasetFacetFields(
                    name="load_filerow",
                    type="INT",
                    description="the row number in the original file",
                ),
                schema_dataset.SchemaDatasetFacetFields(
                    name="load_timestamp",
                    type="DATETIME",
                    description="the time the data was ingested",
                ),
            ]
        ),
        "snowflake://",
    )

    create_user_counts_sql = """CREATE OR REPLACE TABLE TMP_DEMO.USER_COUNTS AS (
            SELECT DATE_TRUNC(DAY, created_at) date, COUNT(id) as user_count
            FROM TMP_DEMO.USER_HISTORY
            GROUP BY date
            )"""

    # location of the source code
    location = "https://github.com/some/airflow/dags/example/user_trends.py"

    # run simulating Airflow DAG with snowflake operator
    addRunEvents(
        events,
        dag_name + ".create_user_counts",
        create_user_counts_sql,
        [user_history],
        [user_counts],
        i,
        11,
        location,
    )


for event in events:
    from openlineage.client.serde import Serde

    print(event)
    print(Serde.to_json(event))
    # time.sleep(1)
    client.emit(event)
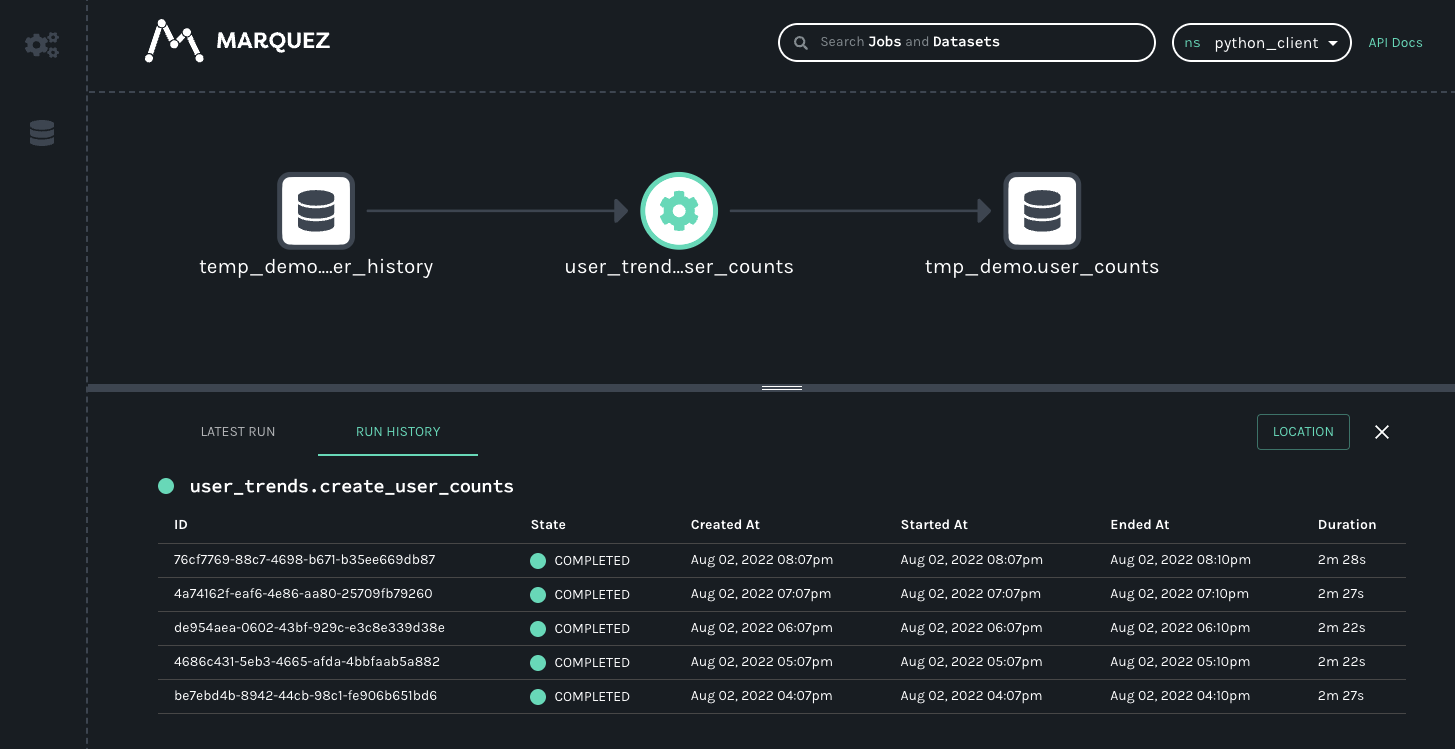
The resulting lineage events received by Marquez would look like this.